Ever snapped a perfect shot, but it's just not Instagram-ready because of some unwanted elements? Don't worry, your iPhone's got you covered. It's equipped with a handy tool that allows you to crop photos with ease.
Whether you're a professional photographer or just someone who loves to capture moments, knowing how to crop photos on your iPhone can enhance your images. It's not just about removing unwanted parts, it's also about focusing on the subject and improving the overall composition.
So, ready to learn the ropes? Let's dive into the simple steps on how to crop photos on your iPhone and start turning those good photos into great ones.
Why crop photos on iPhone?
It's likely that you've taken some stunning photos with your iPhone. Yet, you may have noticed that sometimes a stray object in the background or an awkward angle detracts from the beauty of your image. Cropping your photos on an iPhone is an effective way to eliminate these distractions and put the focus back on your main subject.
Cropping is not just about eliminating unwanted factors though. It's a practical tool to improve the overall composition of your photos. Photography rules such as the Rule of Thirds or Golden Ratio can be applied to enhance the image's visual appeal. With the iPhone's user-friendly photo editing software, it's easy to align the subject of your image to these photography principles after the snapshot has been taken.
Another reason to crop images is to adapt them to specific dimensions or aspect ratios. This can be very handy, especially when you want to post your photos on social platforms like Instagram which favors square images. Alternatively, you might need a cover photo for your Facebook profile or LinkedIn that requires a more panoramic crop. Your iPhone equips you with the ability to make these specific image size adjustments on the go.
Lastly, let's not forget about your overall storytelling with the photo. With careful cropping, you can highlight the most important elements of your picture. This could significantly change the interpretation of the photograph and make your storytelling more precise and influential.
Let's now take you through the specific steps on how to crop photos on your iPhone to capitalize on all these benefits.
Understanding the aspect ratio

Aspect ratio, this term might seem technical, but it's important to grasp if you're looking to perfect those iPhone shots. Not to fear, though, it's simpler than it sounds.
Aspect ratio is essentially the relationship of an image's width to its height. Example ratios could be 1:1 for perfectly square, 4:3 for conventional photography, or 16:9 for robust widescreen shots. So flexible, isn't it?
It's not just about aesthetics either. Aspect ratios on your iPhone can significantly affect your photos' compatibility with other platforms. Let's say you need to post an image on Instagram. Well, they prefer photos to be uploaded in a 1:1 ratio, which is square in format. Other platforms, however, will accept and display different aspect ratios accordingly. Knowing your target platform and utilizing the appropriate aspect ratio on your iPhone can maximize your photo's visual impact.
So, how do you change the aspect ratio on your iPhone when cropping your photos? Simple:
- Navigate to your photos app and open the image you wish to crop.
- Select the 'Edit' icon on the top right.
- Click on the crop icon which is usually the rightmost option.
- Find the 'Aspect Ratio' option and click on it. You'll be able to choose from a list of preset aspect ratios.
As you shift between various aspect ratio options, you'll quickly see the transformative effects each setting can produce. Mastering this little trick allows you to become a better storyteller by intensifying the main elements of your pictures.
Really, the power to manipulate a photo's viewer experience rests at your fingertips once you master aspect ratios. As a budding iPhone photographer, this tool will be a staple in your photography kit, mixing utility with creativity.
Speaking of creativity, let's take a look at some other tools available on your iPhone to enhance your photography.
Step 1: Open the Photos app

You've understood the importance of aspect ratios and you're ready to apply your knowledge to the canvas of your own photography. Applying these skills begins in the Photos app, which is not just your gallery - it's a powerful tool that Apple has refined over the years.
Embarking on your journey towards better photos is as simple as tapping on the Photos app icon. You'll find it on your home screen; it's the one with the multi-colored flower symbol. Go ahead, tap on it. Before you is your collection of memories, moments, and perspectives. Stored in your pocket, these reflect your life as you see it and with the right tools, you can enhance your view. All this is possible through a device you carry every day.
In this digital library, use the Search tab in the bottom right corner to find your desired photo. Remember, the one you've been looking to apply your newfound understanding of aspect ratios. Perhaps it's a shot from your weekend trip or a candid moment from a casual outing.
Tap on it. This opens a world of possibilities. The next steps will guide your through the transformations and adjustments to make your photos stand out.
In your journey, understanding the tools you have is key. These include Light, Color, and B&W, which are part of the native iOS photography enhancement options. However, let's not jump ahead. For now, you're one step closer to your objective.
Continue discovering. The canvas awaits.
Step 2: Select the photo you want to crop

The beauty of photo editing is that it’s a process of exploration and discovery. As you navigate deeper into the world of iPhone photography, remember that every photo offers a new opportunity to enhance and tell a story. So let's get right to it. After opening your Photos app, selecting the correct photo is your next step.
When you open your Photos app, you'll see all the photos stored on your iPhone. Swipe up or down to scroll through your collection. An ideal photo for experimenting with aspect ratios could be one with space around the main subject or an image where you think altering the proportions might create new possibilities. Start somewhere, and remember - there's no 'right’ or 'wrong' in creative expression.
After spotting the photo you wish to work with, tap on it. This will bring up the photo on the full screen, ready for you to work your magic on it. Here's your chance to bring those transformations to life.
At the bottom of the screen, you'll encounter several options - such as “Edit,” “Share” or “Delete." For the purpose of cropping and adjusting the aspect ratio, you're interested in the Edit option. Tap on the ‘Edit’ button located in the upper right corner of your screen to proceed.
So, you’ve managed to open the Photos app, pinpointed the image you'd like to edit, and located the 'Edit' button. We'll delve into the conversion that your photo will undergo in the next section. Discussing what different adjustments can do to alter the vibe of your image, we'll guide you through manipulating those native iOS photography enhancement options - Light, Color, and B&W.
Delving into this creative process will not only improve your technical skills but also your understanding of what kind of images suit which aspect ratios. It may seem a tad complex now, but you'll get the hang of it. After all, photography and photo editing are about trial and error, discovery, and refinement. So let's move on to the next step — editing that chosen snapshot and transforming it into a visual masterpiece.
Step 3: Tap on the Edit option

Now you've warmed up with exploring your iPhone's Photos app and selecting the right shot, it's time to delve into the actual image editing process. Remember, enhancing a photo isn't just about slapping on filters and hoping for the best; it's a creative journey that relies on a careful blend of technique and personal style.
Think of your chosen image as a canvas, and your iPhone as the palette filled with tools to create your masterpiece. So let's dig in: tap the Edit option, located in the upper right-hand corner of your screen.
By tapping on the 'Edit' button, you're now unlocking a suite of editing functionalities that the Photos app offers. These options range from automated adjustments for aspects like light and color, to more granular, hands-on adjustments for things like exposure, saturation, or contrast.
Each option under the Edit suite serves a unique purpose:
- Light: Think of this as your tool to control exposure, brilliance, highlights, shadows, brightness, contrast, and black point.
- Color: Tweak the saturation, contrast, and cast with this versatile tool. It's your one-stop solution for color related adjustments.
- Black & White: For those of you who love monochrome, this tool lets you manipulate the intensity, neutrals, tone, and grain on your image.
Don’t hold back! Fiddle around with these tools and see drastic changes unravel on your screen.
Moving on, let's focus on how you can specifically adjust the aspect ratio of your image in the subsequent step. We'll introduce you to the crop function under the Edit suite, which inherently houses the aspect ratio adjustment tool. So, when you're ready, let's proceed to the next step of your image editing journey with the iPhone: capitalizing on the crop function.
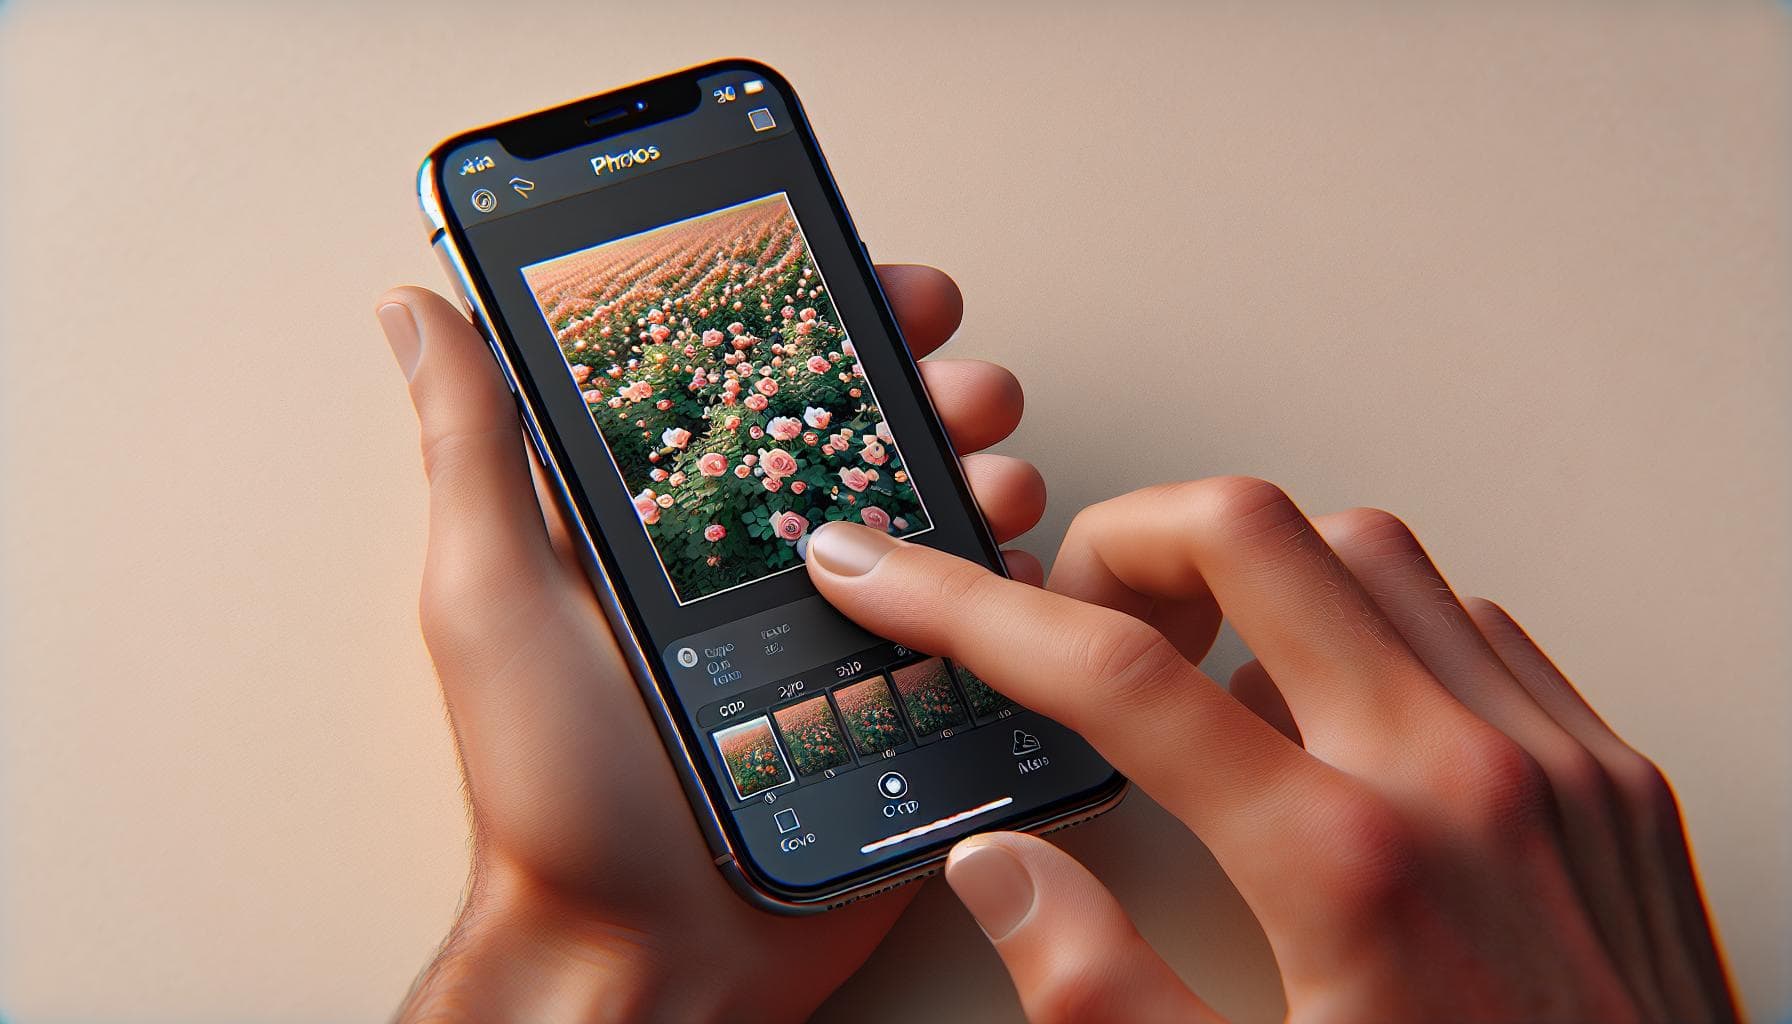
Step 4: Access the cropping tool

With your favorite photo open and your fingers primed for editing, it's time to delve into the heart of iPhone photo manipulation - the crop tool. In the Photos app, find the Edit suite is where you'll uncover the cropping tool, offering a world of creative possibilities right at your fingertips. This tool is what gives you the power to reframe and re-imagine your photos in ways you never thought possible.
To access the cropping tool, first align your sight to the top right corner of your screen. It's time to tap on the icon that resembles two right angles forming a square, symbolizing the photo cropping process.
All it takes is a gentle tap, and before you know it, you're right smack in the middle of the cropping interface. The screen instantly transforms, providing you with a host of options to give your photo the makeover of your dreams. The rule of setting aspect ratio, it's all about precision and creativity. Now that you're there, it's about time to figure out what all those buttons and sliders do, isn't it?
Make Your Way Around the Tools
At this point, you've unlocked several options to revamp your pictures. You may freely rotate your images with ease, tilt them to any angle you like or even flip them to your heart's desire.
You might be interested in some brief technical details. Here, we make mention of two primary sliders - the straighten tool and the rotation tool. The straighten tool, indicated by a slider with a percentage scale, helps you align the horizon of your photos. On the other hand, the rotation tool lets you spin the image to any angle.
| Tool | Function |
|---|---|
| Straighten | Aligns Horizon |
| Rotation | Spins Image to Any Angle |
Remember, this is your playground. Feel free to explore, discover, and create magic with a tap or a swipe. Make those photos tell a story, evoke an emotion - all within the boundaries of your iPhone screen.
Keep your eyes peeled for the next step, where we'll dive even deeper into the world of image resizing and cropping.
Step 5: Adjust the crop box
Laying hold of the reins on cropping your image will take your photo editing skills to the next level. Now that you've got a grip on how to access the cropping tool, it's time to navigate through adjusting the crop box, which may seem tricky at first but trust me, it's effortless once you get the hang of it.
When you tap on the cropping icon, a grid appears over your photo with corner and edge handles. These handles enable you to adjust the crop box to the dimensions you want. You just need to press and drag the corners or the edges of the grid to make the desired changes. Tugging at the handles will give you substantial control over the final frame of your image.
Let's take a gander at the different scenarios where adjusting the crop box can be utterly constructive:
- Squaring a photo for a profile picture
- Shaving off extraneous space around the main subject
- Recomposing a photo by centering or off-centering the primary focus.
Remember, your aim is to strike balance, to accentuate the beauty or the focus of your photo, not to obliterate it by ruthless cropping. With a bit of practice and patience, you'll master the art of knowing how much to crop and when to stop.
Speaking of cropping, there's a nifty feature you'll find in the top right corner of the cropping mode. It's labeled as the "aspect ratio" option, denoted by two intersecting lines. Tap on this to courageously tackle precise crop dimensions. This option expands to a list of commonly used crop formats, such as square (1:1), portrait (4:3), and landscape (16:9).
Selecting any of these formats automatically adjusts your crop box to that shape. And, if you wish to switch between the landscape and portrait orientations, tap on the icon that looks like an arrow circling around a box in the top-left corner of the crop mode.
Roll up your sleeves and get ready for the next step: Image resizing. Yes, it's an integral feature that often goes hand in hand with cropping. But that, my friend, is a tale for another step.
Step 6: Apply the crop
Now that you've mastered the art of adjusting the crop box and played with different aspect ratios, it's time for the real action - applying the crop.
Once you're satisfied with your selections, go ahead and apply the crop. Remember, cropping doesn't have to be a daunting task but rather a step forward in enhancing your photo's aesthetic appeal.
To do this:
- Press Done in the lower right corner of your screen.
- The app will automatically apply your changes to the photo.
Remember: The Photos app allows you to revert your edits at any time, giving you the freedom to experiment with different cropping dimensions without the fear of irreversible alterations. To revert to the original photo, select Edit then tap Revert.
The iOS Photos app also offers the option of sliding controls for Light and Color which you can play around with to further enhance your cropped photo. These sliders allow you to modify the brightness, contrast, saturation, and other aspects of your photo until it achieves your desired look. Additionally, features such as filters, remove red-eye, and clone stamp are also available for you to make use of and up your photography game.
After your photo has been cropped and edited to perfection, it's essential to save it in a safe place. One recommended way is to save it to the Photos app or upload it to iCloud. Keeping a backup of your edited photos ensures that they won't be accidentally deleted or lost.
Stay tuned now. Coming up next, we will delve deeper into the world of image resizing and what it means for your photo editing skills.

After you've flexed your cropping skills, it's time to save your masterpiece or share it with the world. Remember, sharing your edited images is a great way to let others know you're not just snapping photos, but you're consciously striving to improve your photography skills. Here is how you can do both.
Click on the "Done" button located in the bottom right corner of your screen after you've adjusted everything to your satisfaction. Once clicked, your edited version of the photo will automatically replace the original in your photo library. Fear not, the Photos app still keeps the original photo, giving you the option to revert your changes later if you so choose.
If you wish to save a copy of both the original and the cropped photo, you'll need to hit the 'Share' button instead of 'Done'. The 'Share' button (represented by a rectangle with an arrow pointing upwards) is located at the bottom left of your screen. This allows you to share your modish photo directly through various platforms like Instagram, Facebook and WhatsApp, or save the photo to Files.
To save a copy without sharing, choose 'Save to Files' then select where you want to save it. Whether that is your iPhone, iCloud Drive, or a specific folder. This way, you'll have both original and cropped versions available to you, adding flexibility to your creative game.
You might also want to spruce up your newly minted shot with complementary editing features available within the app - sliding controls for light and color, filters to convey different moods, red-eye removal, or even the clone stamp can enhance your picture to another level. There's no limit to what you can do with these digital tools at your fingertips.
Tips for cropping photos on iPhone

Now that you're familiar with cropping and its nuances, let's discuss some tips to enhance your iPhone photo cropping journey.
Remember, Cropping is an Art! When editing, practice the rule of thirds. Visualize your photo as a grid with nine equally sized squares, and aim to place the subject along these lines or at the intersections. This technique can dramatically improve the composition of your photos.
Don't forget about the aspect ratio. It's an often under-used tool but can make a world of difference to the final product. Using the right aspect ratio can enhance your subject or the composition most effectively.
Here are a few more tips:
- Zoom! Before you crop, try zooming into your photo. It can give you a better idea of the details you may lose.
- Remember, less is sometimes more. Try not to remove too much during the cropping process. You might end up taking away from the natural beauty of the picture.
- Always consider the platform you are using. Instagram prefers square images, while Pinterest promotes vertical photos.
The following are the recommended aspect ratios for popular social media platforms.
| Platform | Ideal Aspect Ratio |
|---|---|
| 1:1 | |
| 9:16 | |
| 16:9 | |
| 2:3 |
Don't shy away from exploring additional editing features. The sliding controls for light and color, filters, red-eye removal, and the clone stamp are all there to help you enhance your cropped masterpiece.
The key is to keep in mind the purpose of your image – whether you’re setting up an Instagram post, adding a picture to your iPhone contact list, or just trying to improve the look of your treasured moments. Your goal plays a huge role in the final cropping decision.
Special note: Always remember to save your edits. You can either replace the original or keep a separate copy of the edited version.
Let's explore another vital part of the image editing journey - resizing your pictures on iPhone.
Conclusion
You've now got the knowledge to crop photos on your iPhone like a pro. Remember, adjusting the crop box can transform your images, whether you're squaring a photo or recomposing the primary focus. Don't forget to consider the aspect ratio and the rule of thirds to enhance your photo cropping skills. With practice, you'll master this art and create stunning photos for any platform. And always save your edited photos to preserve your hard work. Ready for more? Stay tuned as we dive into image resizing next. Your journey to becoming an iPhone photography expert continues.
Frequently Asked Questions
1. Why should I adjust the crop box in the Photos app on my iPhone?
Adjusting the crop box allows you to improve the composition of your photos. You may want to square a photo for a profile picture or reposition the primary focus of your photo for a more appealing visual effect.
2. What is an aspect ratio, and why is it important in cropping photos?
The aspect ratio is the proportion between the width and the height of an image. It influences how your image looks when displayed. Different aspect ratios work better for different platforms, so it's important to consider when cropping photos.
3. Are there any guidelines that can enhance my iPhone photo cropping?
Yes, one popular guideline is the rule of thirds. It encourages you to mentally divide your photo into nine equal segments by two horizontal and two vertical lines. The important elements should be placed along these lines or their intersections.
Each platform has different recommendations. For instance, Instagram typically uses a 1:1 square aspect ratio, while Pinterest prefers a vertical layout like 2:3. Remember to check the specific aspect ratio guidelines of the social media platform you are using.
5. Should I save the edits I make to my photos?
Yes. After adjusting the crop box and making any other changes, remember to save your edited photo. This ensures that you retain the modifications without changing the original file, giving you more options for future use.


