Ever felt like your iPhone's default ringtone doesn't quite express your unique style? You're not alone. Many iPhone users are in the same boat, looking to personalize their device with a ringtone that speaks to them.
Changing your iPhone's ringtone is a straightforward process, but if you're new to the iOS interface, it can seem a bit daunting. Don't worry, we've got your back. This guide will walk you through every step, so you can make your iPhone sound just the way you want it to.
So, let's dive in and give your iPhone that personal touch it's been missing. In no time at all, you'll be enjoying a ringtone that's as individual as you are.
Why Change Your iPhone Ringtone?
The ringtone of your iPhone, much like your clothing or the music you listen to, forms an important part of your identity. It's more than just a series of notes that make a sound when someone calls or texts you. Your ringtone says a lot about who you are as an individual. A unique ringtone makes your iPhone easily recognizable, granting it a touch of your personality. When your iPhone rings with a custom tone it makes it immediately clear it's your phone that's ringing, not just any iPhone.
Another reason to change your ringtone? The simple fact that customization breeds familiarity. You're the one who gets to decide what sound brings your iPhone to life. This builds a deeper connection between you and your device. With a bespoke ringtone, your iPhone truly becomes your iPhone.
This does scatter a feel-good factor, but it also has a practical aspect. Custom ringtones immediately indicate who's calling. By assigning a unique ringtone for the important people in your life, you can tell who's calling without having to look at your iPhone's screen. That can be a major time-saver in your busy routine.
Moreover, learning to customize your ringtone introduces you to the world of iOS customization. This experience shows you how to make fuller use of your iPhone’s capabilities, leading towards the possibility of a more personalized digital experience.
Finding the Perfect Ringtone

Now that you're familiar with the importance of changing your iPhone ringtone, the next natural step is venturing into the world of possibilities that lie beyond the standard, pre-installed tones. The perfect ringtone is out there, just waiting to make your iPhone truly individual and easily recognizable. It's a tune that's distinctively you, and finding it might be easier than you think!
The first place you might want to start is Apple's extensive library of ringtones. It's made up of hundreds of sounds, ranging from catchy tunes to ambient noise, techno beats, and even comedic sound effects. You also have the option to purchase exclusive ringtones from famous songs and artists via the iTunes Store.
| Source | Number of Ringtones |
|---|---|
| Apple's Library | Hundreds |
| iTunes Store | Thousands |
Here's the thing, you're not limited to just the ringtones Apple provides. Have a favorite song or musician? That's great, you can custom-make a ringtone using it. Free ringtone applications such as GarageBand or Ringtone Maker will allow you to chop up the song to get the perfect snippet for your ringtone. It's quite liberating, really. You can select a section that stands out or aligns with your musical tastes.
Consider your ringtone as your audio fingerprint. Whether it's the latest pop music anthem, a classic rock riff, or the soothing sound of nature, it's there for you. Let's move on to how to actually apply these ringtones, transforming your iPhone from ordinary to extraordinary.
Preparing Your Ringtone Files

Now that you're hyped about changing your ringtone, let's focus on preparing your ringtone files. This step is crucial. When well-executed, it'll pave the way for a seamless transition to using your new ringtone. This part of our guide will walk you through preparing your ringtone files.
The iPhone uses the .m4r format for ringtones. By default, songs are in .mp3 or .m4a format. To convert your song or audio files, ITunes or any reliable audio converter can be your best ally.
For those who decide to use iTunes, the steps are as straightforward as can be:
- Open iTunes and click "Add File to Library" to import your desired song.
- Next, right-click the song, choose 'Get Info' then 'Options'.
- Set the start and stop times to create a 30-second clip (the maximum duration accepted for iPhone ringtones).
- With the clip created, right-click again and select 'Create AAC Version'.
- Once the AAC version of your file is created, find it in Finder or on your Desktop and change the file extension from .m4a to .m4r.
But don't worry if you're not a fan of iTunes. There's a world of audio converters out there ready to get the job done. Many of these tools offer free versions or free trials that you can leverage. Simply upload your audio file, select .m4r as your target format and let the converter do its magic.
Whichever route you choose, remember to keep your new ringtone files handy. You'll need them in the following steps when you finally change your iPhone ringtone.
Stay tuned! We're heading into the great world of ringtone application, a place of personalization and amazing audio experiences on your iPhone.
Importing Your Ringtone to iTunes
So, you've created your one-of-a-kind ringtone and now it's time for the next step. Let's get your ringtone into iTunes. It's important to know the process of importing ringtones is the same regardless of whether the ringtone you created is in .mp3, .m4a, or .m4r format.
To start, launch iTunes on your computer. Look for the "File" option in the menu bar. If you're using a Mac, the File option is located on the top left corner. For Windows users, it's on the top left corner of the iTunes window. Once there, select "Add File to Library" from the dropdown list. This option will help you browse your local disk where your ringtone files are stored.
Locate and select your ringtone file and click the "Open" button. This action will import your custom ringtone into iTunes. You may find it in the "Tones" folder, which should appear after the successful import. If you don’t see your Tones folder, don’t panic; it'll appear once you sync your iPhone with iTunes.
It's worth noting that syncing your iPhone with iTunes lets your device recognize the newly added ringtone. So, after importing the ringtone, make sure to sync your device. Connect your iPhone to your computer and click "Sync". You'll find this option under the phone icon in the top left corner of the screen.
Remember, the process of importing and syncing ringtones requires patience. It might seem a bit complex at first, but once you've done it, you'll find it gets easier over time.
Syncing Your Ringtone to Your iPhone
Now that you've prepared your ringtone file, the next crucial step is syncing it to your iPhone. This cannot be overlooked as your custom ringtone only becomes usable once synced to your device. Here's a simple guide to help you through the process.
First, make sure that your iPhone is connected to your PC. You can do this by using your USB cable. Ensure your iPhone is shown within iTunes. While this may sound basic, it's a step often forgotten.
In your iTunes library, you should see a folder labeled "Tones". This is the essential hub where all your ringtones are stored. To add a new tone, navigate to the folder on your PC where you stored your custom .m4r ringtone. Drag and drop it into the 'Tones' folder on iTunes.
Remember that the name of the ringtone in iTunes should match the file name on your PC. This will ensure successful syncing.
Next, click on your iPhone icon within iTunes to view the Summary Page. On the left side pane, hit the 'Tones' tab.
There's an option - 'Sync Tones'. Select it and choose 'All tones' or 'Selected Tones' based on your preference. If you've multiple tones to sync, the 'All Tones' option is a better choice. But if you only intend on syncing a few selected tones, opt for the latter.
Finally, hit the 'Apply' button and let iTunes carry out the syncing process. Be patient. Do not disconnect your iPhone until the syncing is completed.
Once successfully synced, these ringtones will appear in the sound setting of your iPhone. The custom ringtone you've created is now all set to be assigned to your calls!
Note that the steps outlined above are specific to syncing your custom ringtones using iTunes. However, there are a plethora of other music apps available, offering alternative methods for syncing. Always consider your personal preferences when choosing the method that suits you best.
Setting Your New Ringtone

Now that you've done all the prep work, here's the final and probably the most rewarding step of the process: setting your new ringtone on your iPhone. By this stage, you've custom-made your ringtone, converted it into a .m4r file, and synced it to your device. It's quite like an artist preparing a canvas for a masterpiece. With a few simple steps, you're going to bring all of that hard work to life.
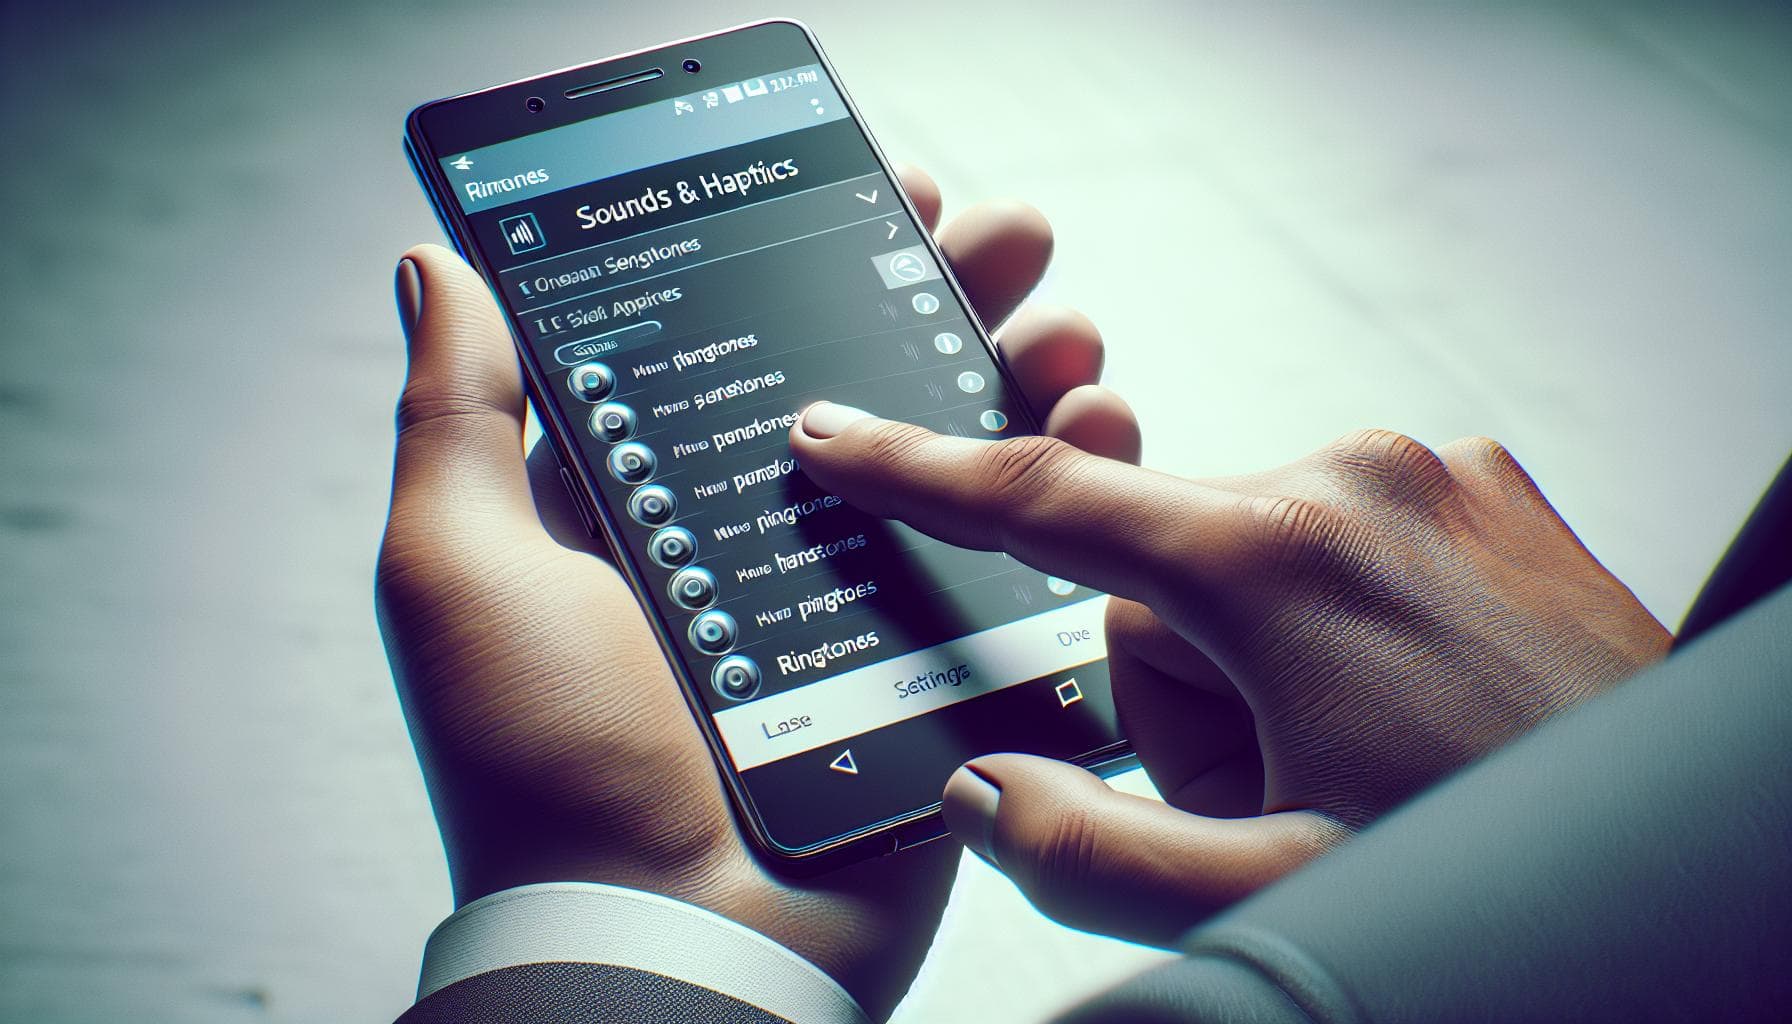
Venture over to your iPhone's settings. From there, select Sounds & Haptics. Among other audio features, you'll find 'Ringtone' on this list. Upon clicking that, you'll be redirected to a page with a list of all available ringtones including the ones synced from your PC.
The moment you've been waiting for. Find your custom ringtone in the list, select it, and voila! Your device now sports a unique, personalized ringtone that's as distinctive as you. Every 'ring' is a reminder of your uniqueness being translated into the auditory world. Give it a try, call yourself from another device and enjoy. Tell me that's not giving you a sense of achievement!
We're not stopping at just one though. Remember how we talked about setting distinct ringtones for specific contacts? That option comes in handy in various scenarios. Whether it's giving your boss a unique tone so you don't accidentally ignore their call or setting a distinctive tone for your family members, these unique assignments can save you precious time and confusion. Head over to your contacts, select the specific person, and tap on 'Edit'. You'll find the ringtone option and now you know what to do!
With your new ringtone in place, your iPhone just graduated from being another device to something far more personal. It isn't just about aesthetics; it's about owning your personal space, your audial identity in essence.
Conclusion
So you've got it. You now know how to set a new ringtone on your iPhone, customize it to your liking, and even assign unique tones to specific contacts. It's all about making your iPhone truly yours. Remember, it's more than just a device—it's an extension of your personality. So let your ringtone speak volumes about who you are and what you love. Go ahead, dive into the Sounds & Haptics settings and start personalizing your iPhone ringtone today. It's your audial identity. Own it.
How do I set a new ringtone on my iPhone?
To set a new ringtone on your iPhone, navigate to your settings, then select 'Sounds & Haptics'. From here, you can choose 'Ringtone' and select your custom ringtone from the provided list.
Why should I set a distinct ringtone for specific contacts?
By assigning distinct ringtones to specific contacts, you can easily identify who is calling without looking at your device. This can be particularly useful for identifying important calls or avoiding unwanted ones.
How can I set personalized ringtones for specific contacts?
You can assign a distinct ringtone for each contact by opening the individual contact file, selecting 'Edit', then 'Ringtone', and finally choosing your desired ringtone.
What does it mean to own my audial identity?
Owning your audial identity means personalizing the sounds your device uses, like ringtones, to suit your preferences and express your personality.


