Difficulty: Easy
Duration: 5 minutes
What you'll need: Mac
- You can easily convert HEIC to JPG on Mac using the free Preview app.
- It will allow them to easily share their photos with others who may not have access to the HEIC format.
- In this article, you'll learn how to quickly and easily convert HEIC images to JPG on your Mac.
If you’re a Mac user, you may have noticed that your photos are saved as HEIC files. HEIC is a new file format that was introduced with iOS 11 and macOS High Sierra. While HEIC is a great format for saving photos, it may not be compatible with some applications and devices.
In this guide, we’ll show you how to change HEIC to JPG on Mac so that you can share your photos with anyone. We’ll walk you through the steps for using the Preview app, as well as a few third-party apps that you can use to quickly and easily convert HEIC to JPG.
How to change HEIC to JPG on Mac using the Preview app
Changing HEIC to JPG on Mac is easy and can be done with the help of a few free apps available on the App Store. This is an important step to take if you want to share your photos with others who may not be able to view HEIC files.
1. Open the HEIC file you want to convert in the Preview app.
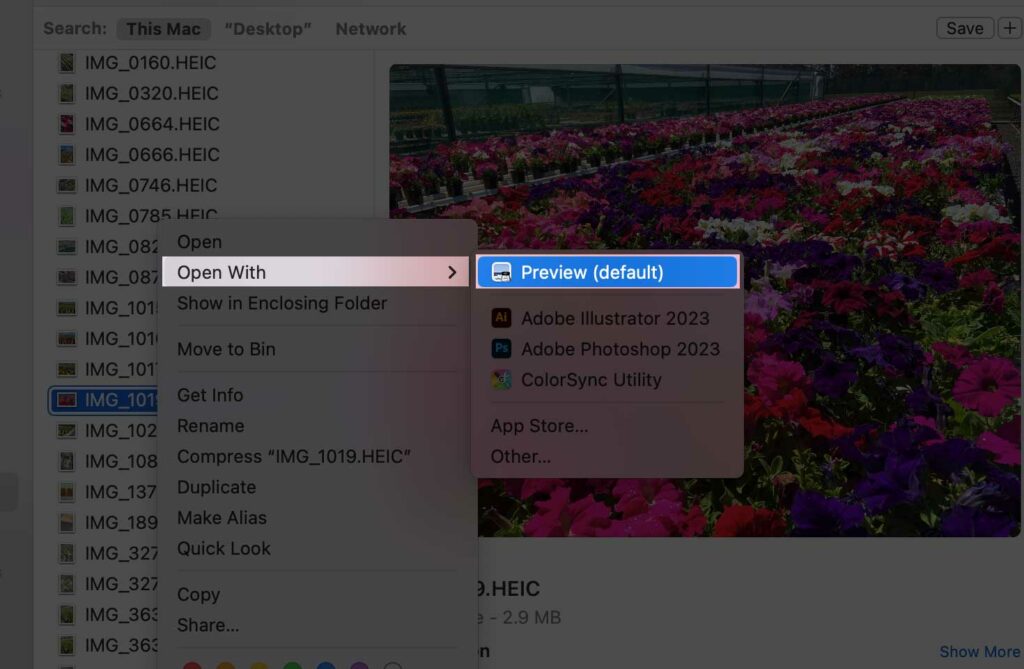
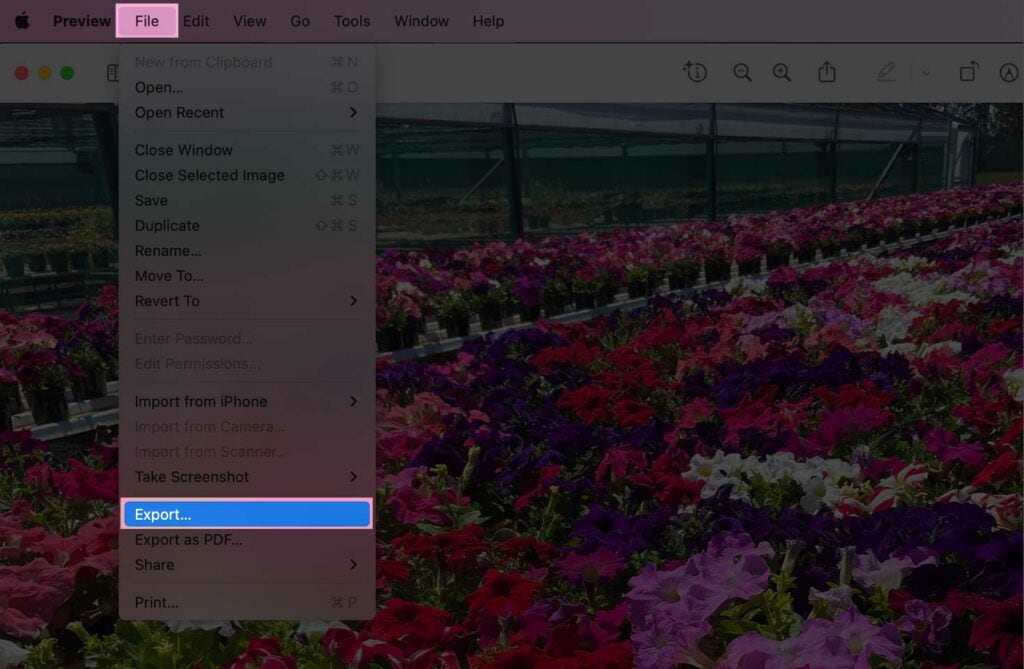
2. Go to File in the top menu bar and select Export.
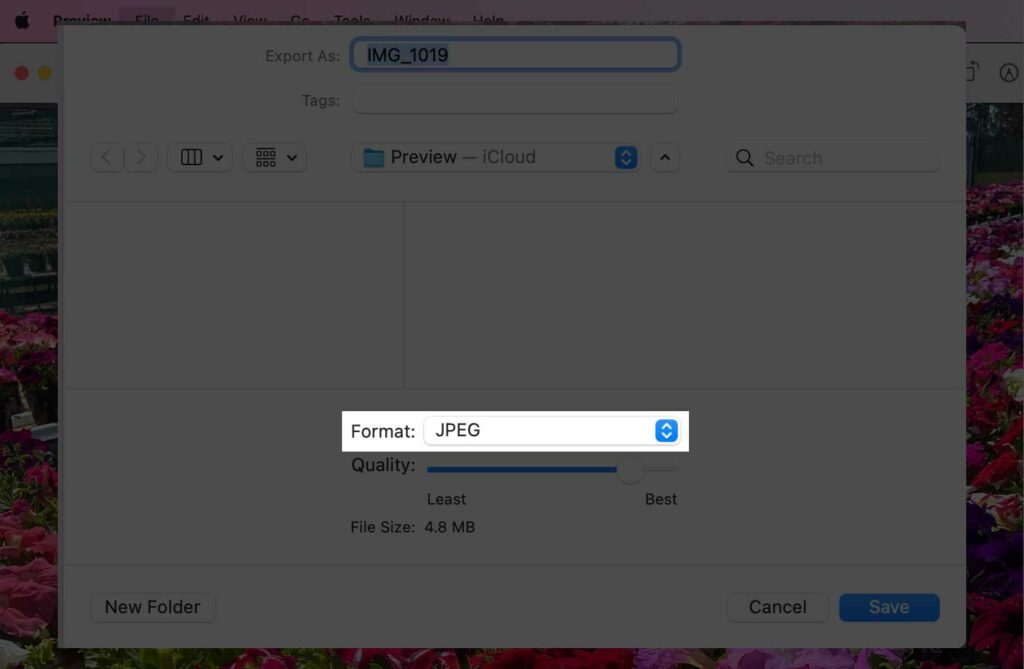
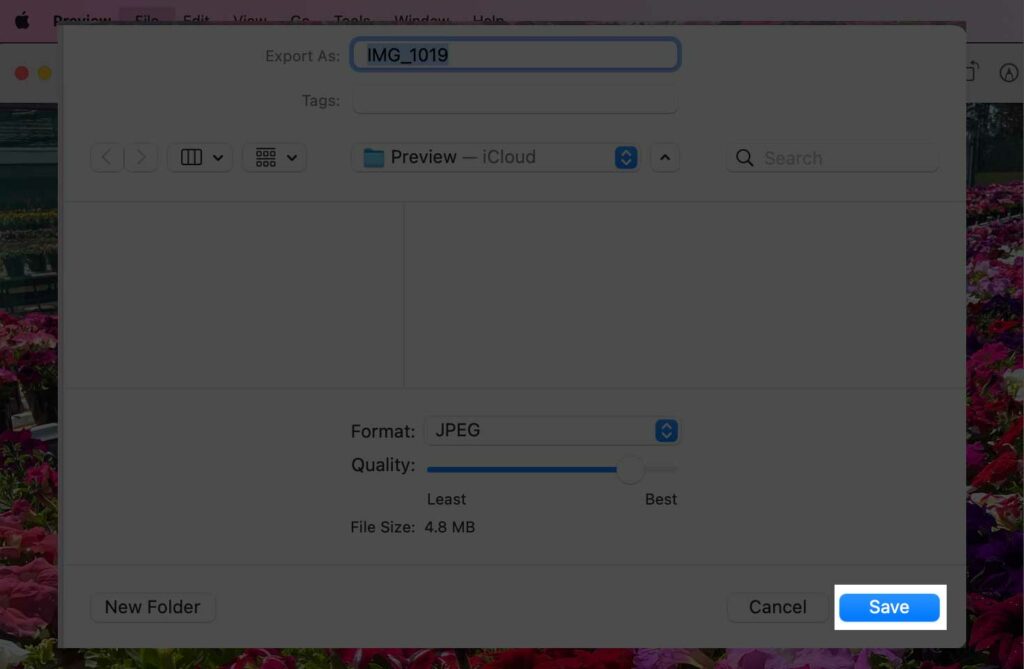
3. Select JPG from the drop-down menu in the Format field.
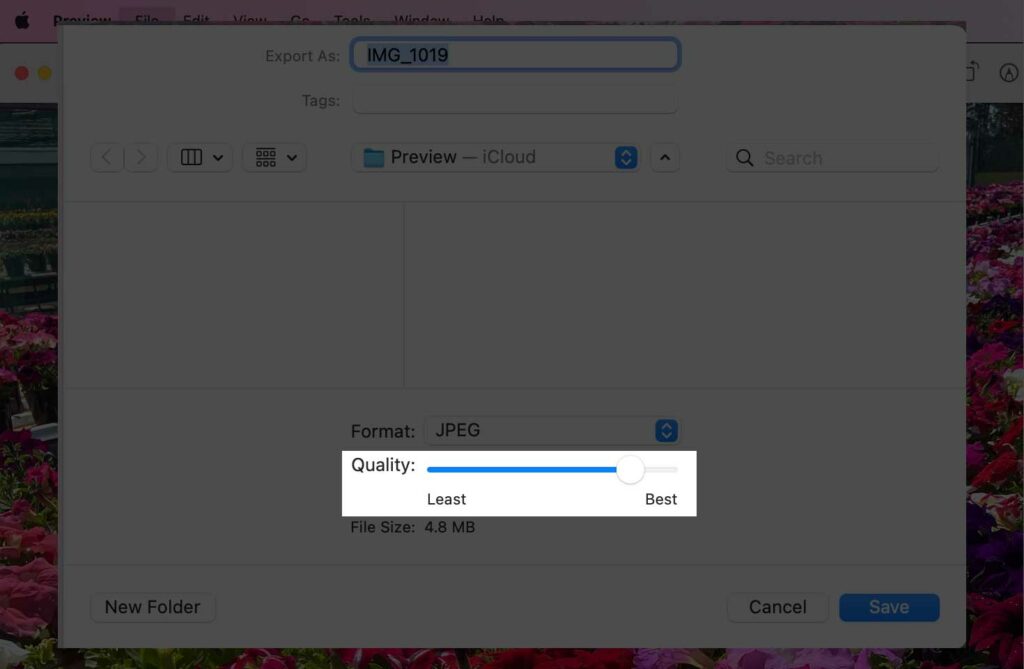
4. Choose the quality of the image you want to save.
5. Click Save to convert the HEIC file to JPG.
Related reading: How to delete photos on Mac.
How to change HEIC to JPG on Mac using the Photos app
To convert HEIC files to JPG using the Photos app on a Mac:
- Open the Photos app.
- Select the HEIC image(s) you want to convert by clicking on them. You can select multiple images by holding the command key while clicking on each image.
- Right-click (or control-click) on the selected image(s) and select "Export"
- In the export window, select "JPEG" from the "Format" dropdown menu.
- Choose a location to save the new JPG file(s)
- Click "Export" to start the conversion process.
- The exported JPG file(s) will be saved in the location you specified.
Note: Exported images will be a copy of the original file, so the original HEIC files will remain in your Photos library.
How to change HEIC to JPG on Mac using a third party app
There are several third-party apps available for Mac that can convert HEIC files to JPG. Some popular options include:
How to change HEIC to JPG on Mac using Adobe Lightroom
- Open Adobe Lightroom
- Drag and drop the HEIC image(s) into the app
- Go to File > Export
- Select JPG from the Format dropdown menu
- Choose a location to save the new JPG file
How to change HEIC to JPG on Mac using GIMP
- Open GIMP
- Go to File > Open and select the HEIC image(s)
- Go to File > Export As
- Select JPG from the Format dropdown menu
- Choose a location to save the new JPG file
How to change HEIC to JPG on Mac using Photoshop
- Open Photoshop
- Go to File > Open and select the HEIC image(s)
- Go to File > Save As
- Select JPG from the Format dropdown menu
- Choose a location to save the new JPG file
How to change HEIC to JPG on Mac using iMazing HEIC Converter
- Install iMazing HEIC Converter on your Mac
- Drag and drop HEIC images into the app
- Choose JPG as the conversion format
- Click on the Convert button
- Select the location where you want to save the JPG files
How to change HEIC to JPG on Mac using HEIC to JPG Converter
- Install HEIC to JPG Converter on your Mac
- Drag and drop HEIC images into the app
- Choose JPG as the conversion format
- Click on the Convert button
- Select the location where you want to save the JPG files
Note: that most of these apps will require a purchase, and some may have a free trial version.
Our takeaway
In conclusion, changing HEIC files to JPG on Mac is a simple and straightforward process. With a few clicks of the mouse, you can easily convert your HEIC files to the more widely accepted JPG format.
The process is quick, easy, and can be completed in just a few minutes. Best of all, you don't need to be a tech expert to get the job done. So don't be intimidated by the process, give it a try, and you'll be surprised at how easy it is to make the switch.
Who knows, you may even enjoy the convenience of working with JPG files on your Mac!
FAQs
What is the difference between a HEIC and JPG file?
The main difference between a HEIC and JPG file is the file size and image quality. HEIC (High Efficiency Image Container) files are smaller in size and offer better image quality than JPG files. HEIC files are also capable of storing multiple images in a single file, while JPG files can only store one image per file.
What are the steps to convert a HEIC file to a JPG file on a Mac?
The steps to convert a HEIC file to a JPG file on a Mac are as follows: 1. Open the HEIC file in Preview. 2. Go to File > Export. 3. Select the JPG file format from the dropdown menu. 4. Adjust the quality settings if needed. 5. Click Save.
Are there any potential issues that could arise when converting a HEIC file to a JPG file?
Yes, potential issues that could arise when converting a HEIC file to a JPG file include losing image quality, losing image metadata, and the file size becoming larger. Additionally, certain features such as transparency may not be supported in JPG files.
Are there any free or paid software programs that can help with the conversion process?
Yes, there are many free and paid software programs available to help with the conversion process. Some popular free options include iMazing HEIC Converter, Aiseesoft HEIC Converter, and Apowersoft HEIC Converter. Paid options include iMyFone HEIC Converter and Movavi HEIC Converter.
Is there any way to batch convert multiple HEIC files to JPG files at once?
Yes, there are several software programs that can help with batch conversion of HEIC files to JPG files. Some of these programs are free, while others require a paid subscription. Examples of programs that offer batch conversion include iMazing HEIC Converter, iMyFone HEIC Converter, and iMazing Photo Converter.


